
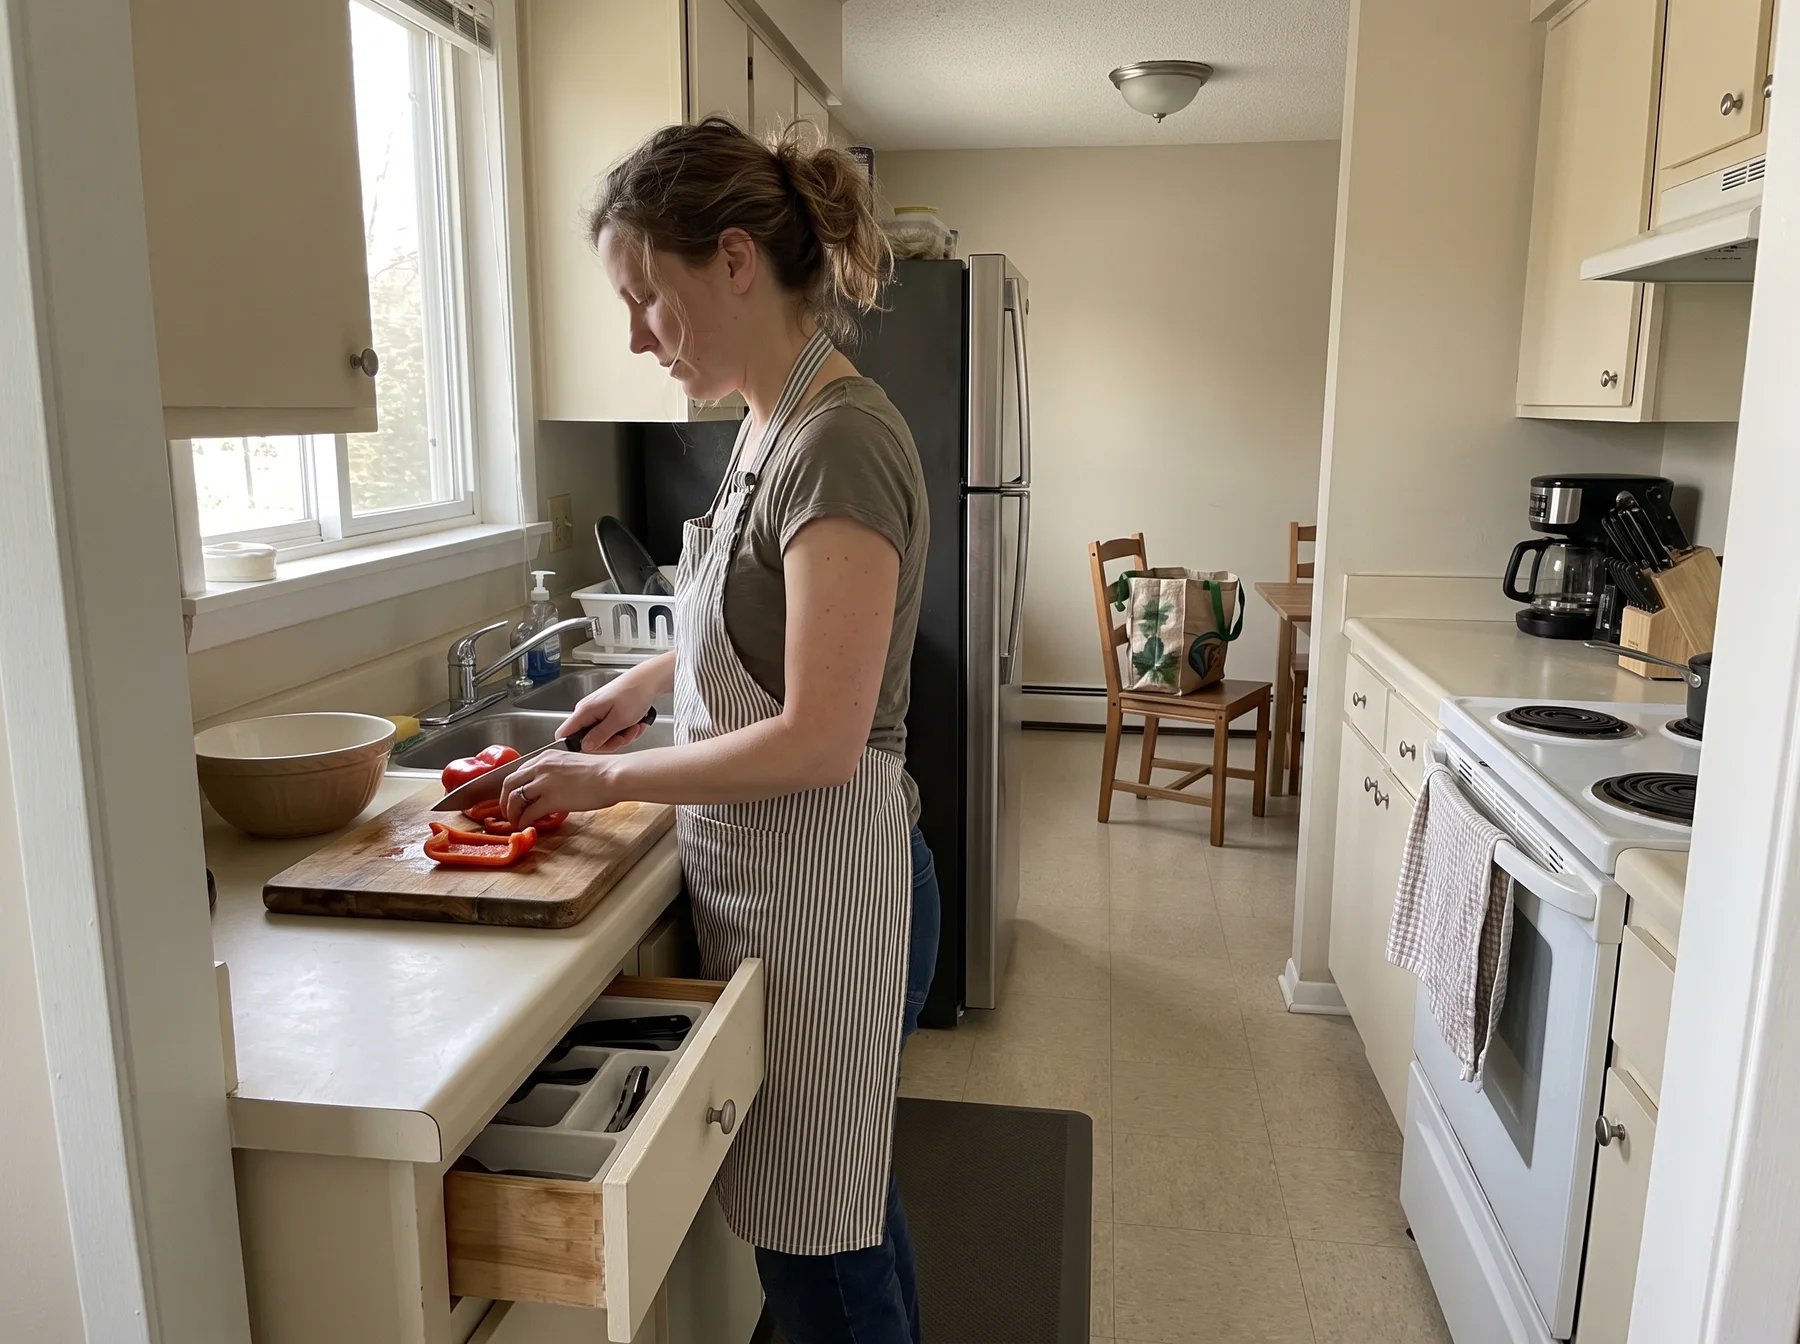
The most effective way to organize a small kitchen is to place items near the task where you use them. Keep food preparation tools by your main work surface, cooking equipment near the range, dishes close to the serving or cleanup area, and daily food within easy reach. Less frequently used items can move to higher shelves, deeper cabinets, or storage outside the kitchen.
This zone-by-zone approach works better than organizing solely by item type. It reduces unnecessary movement, protects limited counter space, and makes it easier to put things away after cooking.
Start with your kitchen, not a shopping list
Before adding organizers, look at the storage you already have and the way you actually cook. A small kitchen used for daily meals needs a different setup from one used mostly for coffee, reheating, and occasional weekend cooking.
Start by identifying four things:
- Your main food preparation surface
- The burners and appliances you use most often
- The path between the refrigerator, sink, and range
- Cabinets or drawers that are easiest to reach
The most accessible storage is valuable. In most kitchens, that means drawers between waist and shoulder height, lower cabinet shelves that do not require kneeling, and upper cabinet shelves that can be reached without a stool. Reserve these places for items used every day or several times a week.
Next, notice the constraints you cannot change. These might include shallow drawers, fixed shelves, a radiator, limited electrical outlets, or a cabinet that must remain accessible for plumbing. Renters should also check lease terms before drilling, mounting rails, or applying adhesive products.
Audit what deserves space in a small kitchen
Take items out one cabinet or drawer at a time rather than emptying the entire kitchen. Working in sections keeps the sink and counters usable during the process.
Sort each section into practical groups:
- Used daily
- Used weekly
- Used occasionally
- Duplicate or no longer useful
- Belongs somewhere else
Be specific about duplicates. Two skillets in different sizes may both earn their place. Five nearly identical wooden spoons probably do not need the same prime location. Keep enough dishes and utensils for your household and normal hosting habits, but avoid using everyday cabinets as long-term storage for extras.
Also look for items that entered the kitchen by habit rather than function. Mail, tools, reusable shopping bags, medicine, and cleaning products can consume useful cooking space. Some may need to stay in the kitchen, but they should have defined locations away from heat, food preparation surfaces, and children or pets where relevant.
If one cabinet also serves as your pantry, the same frequency rules apply. Our guide to organizing a one-cabinet pantry without decanting everything explains how to group packaged foods while keeping labels and cooking instructions intact.
How to organize a small kitchen by working zones
Kitchen zones do not require a large room or a traditional layout. A zone may be one drawer, half a cabinet, or a section of counter. The goal is to give each task a convenient home without storing everything next to everything else.
Food preparation zone
Choose the largest safe stretch of clear counter as your main preparation area. Store the tools used there as close as possible.
Useful items for this zone may include:
- Cutting boards
- Knives in an appropriate holder or drawer insert
- Measuring cups and spoons
- Mixing bowls
- Colanders
- Frequently used food storage containers
Keep only tools that support routine preparation on the counter. A knife block, utensil crock, and cutting board can quickly occupy most of a short work surface. If drawer or cabinet storage is available, use it to preserve enough counter depth for a cutting board and ingredients.
Nest bowls and colanders only when they are easy to separate. A deeply nested stack that must be dismantled every morning is not efficient storage. Store lids vertically in a stable divider or shallow bin if loose lids regularly slide behind other items.
Cooking zone
The cooking zone includes the range, oven, and the cabinets or drawers beside them. Place your most frequently used pans, cooking utensils, pot holders, and heat-safe trivets here.
Heavy pots and cast iron cookware are generally easier to handle in a lower cabinet or sturdy drawer. Keep weight limits and drawer hardware in mind, and avoid creating a tall, unstable stack. Store the most frequently used pan on top or vertically in a suitable rack if the cabinet allows it.
Cooking oils and seasonings should be convenient but not exposed to unnecessary heat from the range or direct sunlight. A nearby cabinet is often better than the narrow ledge above or beside the stove. Follow product label directions for food storage.
Cleanup zone
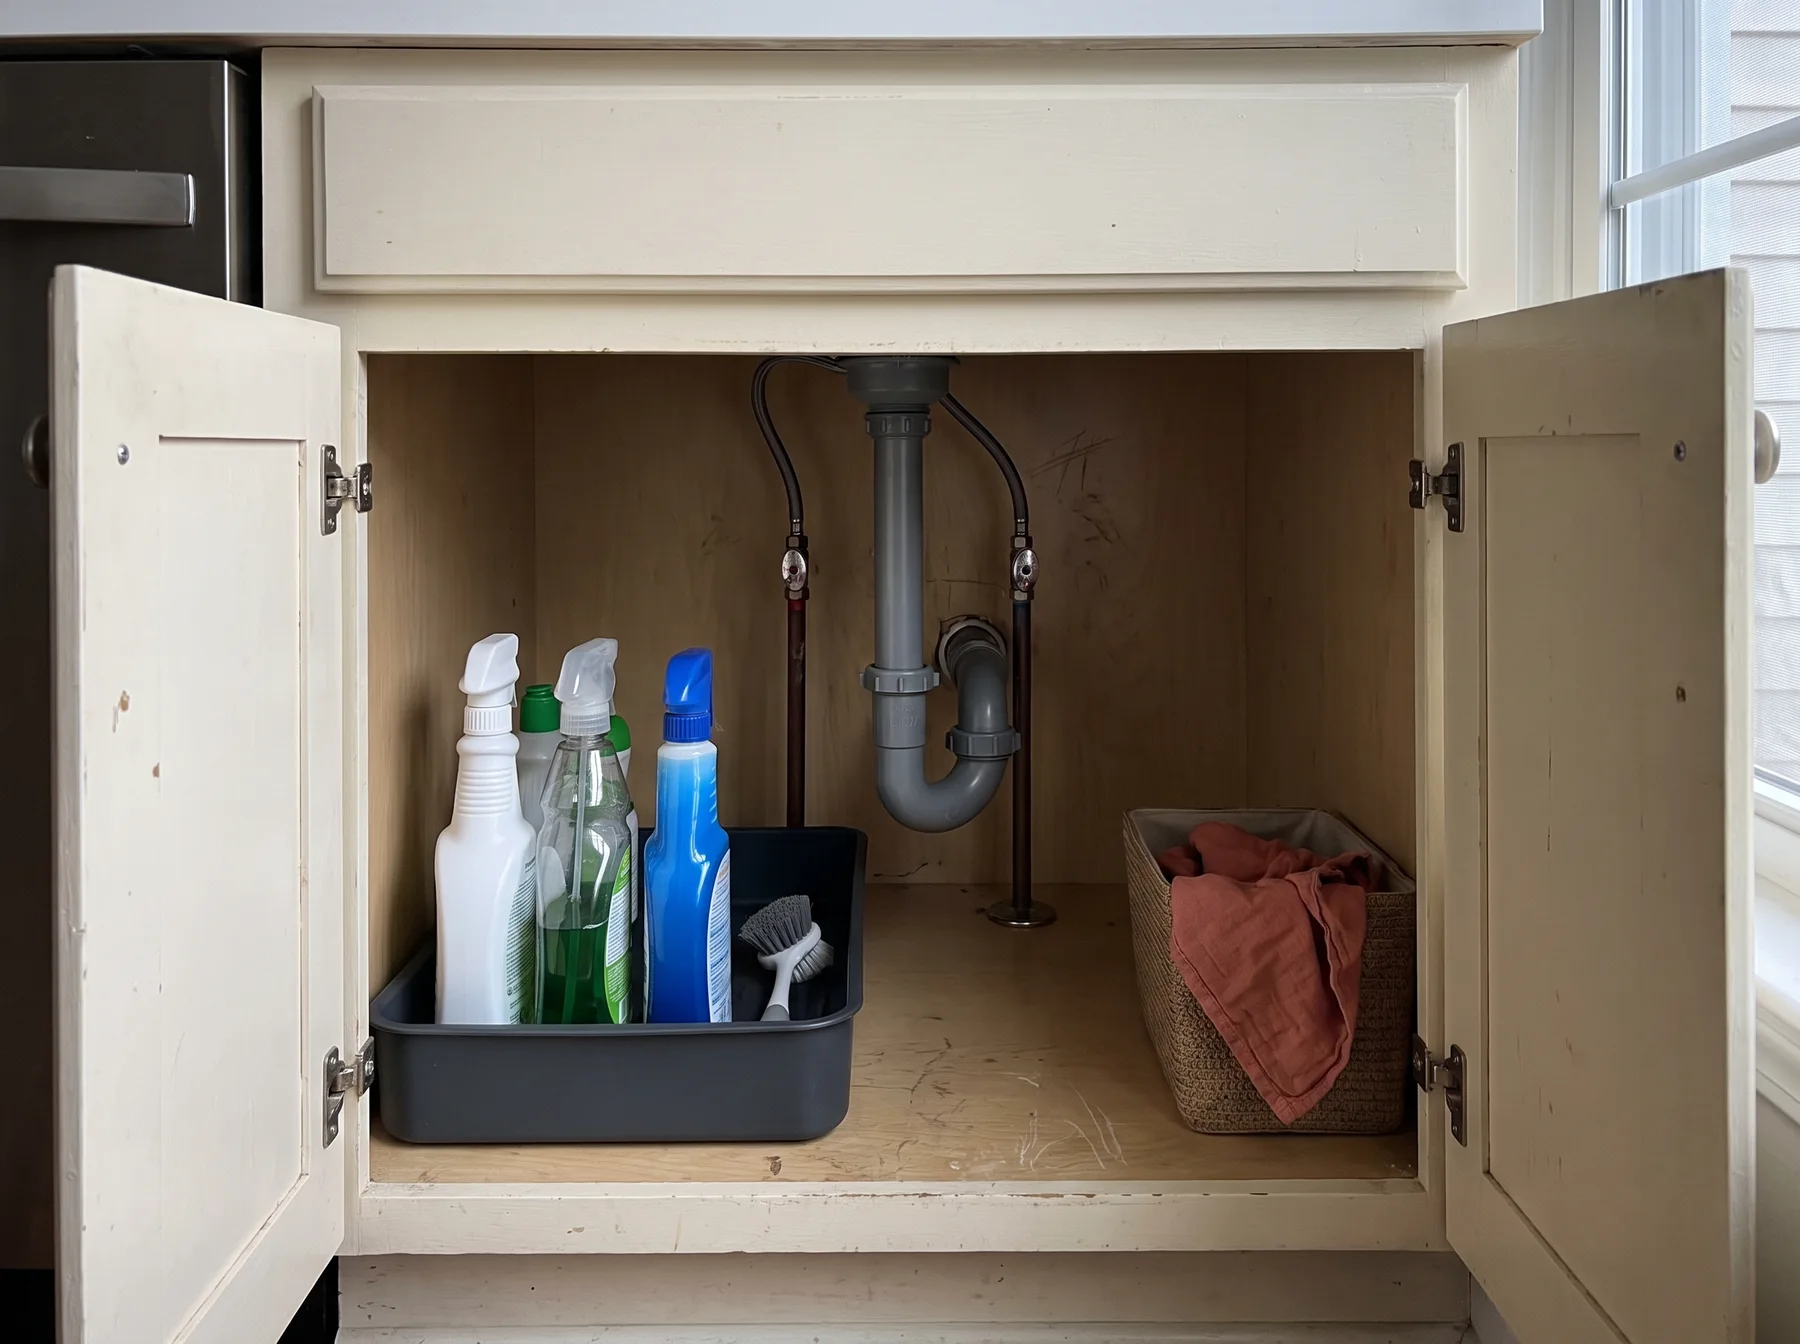
Build the cleanup zone around the sink and dishwasher, if you have one. Dish soap, brushes, dishwasher supplies, towels, and waste bags should be accessible without spreading across the food preparation area.
Under-sink storage needs special care because plumbing can leak and pipes reduce usable space. Keep products upright, follow label directions, and do not combine household chemicals in a single unlabeled container. A removable tray can contain minor drips and make it easier to inspect the cabinet floor.
Store dishes close to where they are washed or unloaded when possible. This shortens the put-away route. If the cabinets beside the sink are awkward or too high, a drawer or lower cabinet near the dishwasher may be a better home for plates and bowls.
Serving and daily-use zone
Group the things used to set the table, pack lunch, or make a quick meal. This could include plates, bowls, glasses, flatware, napkins, lunch containers, and reusable bottles.
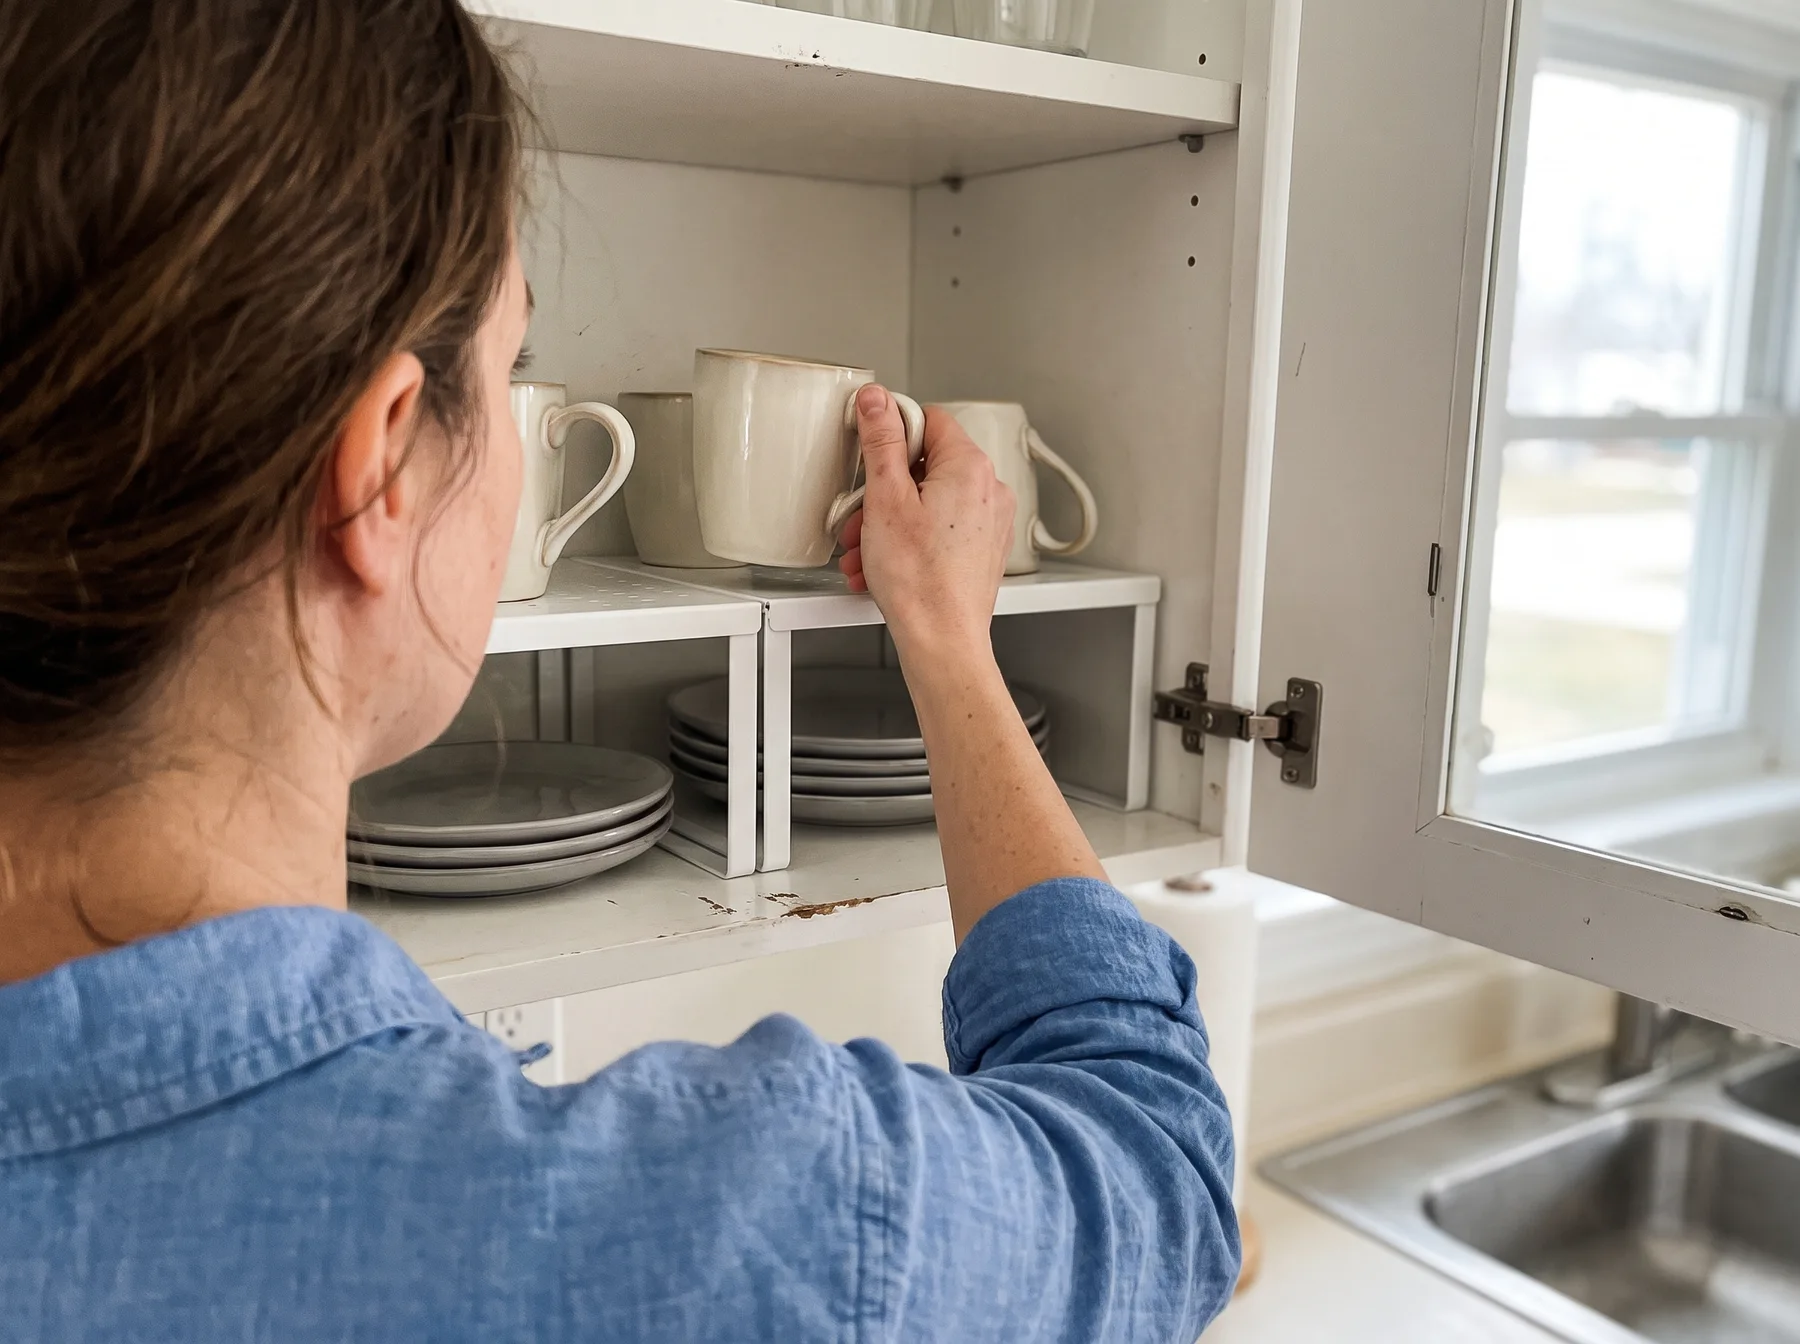
Do not assume every dish must live in one cabinet. In a very small kitchen, mugs may fit better above the coffee maker while plates sit near the dishwasher. Storage should support the task, even if a traditional dish cabinet would look more orderly.
When cabinet shelves have a lot of unused vertical space, a riser can separate short stacks of plates or mugs. The Amazon Basics stackable cabinet shelf risers are coated metal risers measuring approximately 12.5 by 8 by 4.5 inches each. Measure the cabinet interior first, including shelf height, hinges, and the clearance needed to remove items without tipping them.
Pantry and ingredient zone
Keep everyday ingredients between eye and waist height when possible. Group foods according to how you cook rather than creating overly narrow categories. Breakfast foods, baking supplies, quick lunches, snacks, and dinner staples are often more useful groups than arranging every package by size.
Use shallow bins for flexible packages that fall over, but avoid putting unrelated foods into deep containers where labels disappear. Turn cans and boxes so names and dates remain visible. Place newer groceries behind older ones when practical.
Reserve high shelves for light, occasional items such as spare paper goods or seasonal serving pieces. Avoid storing heavy appliances, glass containers, or large liquid bottles where you need to lift them overhead.
Beverage or breakfast zone
If coffee, tea, or breakfast creates traffic each morning, give it a compact zone outside the main cooking path. Keep mugs, filters, tea, cereal, or other routine supplies together where space allows.
This does not require leaving every appliance on the counter. An appliance used daily may justify a permanent spot, while one used weekly can live in a nearby cabinet. Appliances used only a few times a year can move to a high shelf, closet, or another dry storage area. Apply the same fit-first thinking used in our room-by-room small apartment organization system: frequent use earns convenient space, while occasional use moves farther away.
Use cabinets and drawers without making them harder to reach
Good organizers reduce lifting, stacking, and searching. They should not simply pack more objects into the same cabinet.
Divide deep storage into accessible sections
Deep cabinets often hide small items behind larger ones. Use short bins, turntables, or pullout organizers only when you can remove or rotate them without striking hinges and pipes. Labeling the front of an opaque bin can help, but clear visibility is usually better for food.
A bin should hold one useful category and remain light enough to move safely. If you must unload the front half of a cabinet to reach the back, move occasional items to the back and keep daily items in front.
Make drawer categories match the drawer size
Use shallow drawers for flatware, small utensils, wraps, or linens. Deeper drawers can hold bowls, food containers, or pans if the drawer is designed for the weight.
Avoid filling a utensil drawer so tightly that tools overlap and catch when it opens. Keep the tools you reach for repeatedly, then relocate specialty gadgets to a less accessible drawer or lidded box.
Use doors and walls selectively
Cabinet doors can hold light items when a properly fitted organizer does not interfere with shelves, hinges, or closure. Walls and cabinet sides may also provide storage, but renters should get permission before drilling and should verify that no plumbing or electrical lines are in the mounting area.
Adhesive hooks can fail on textured, damp, greasy, or heat-exposed surfaces. Follow the manufacturer's surface preparation and weight guidance. Do not hang knives, heavy cookware, or breakable items from an unverified adhesive attachment.
Add freestanding storage only when the floor plan allows it
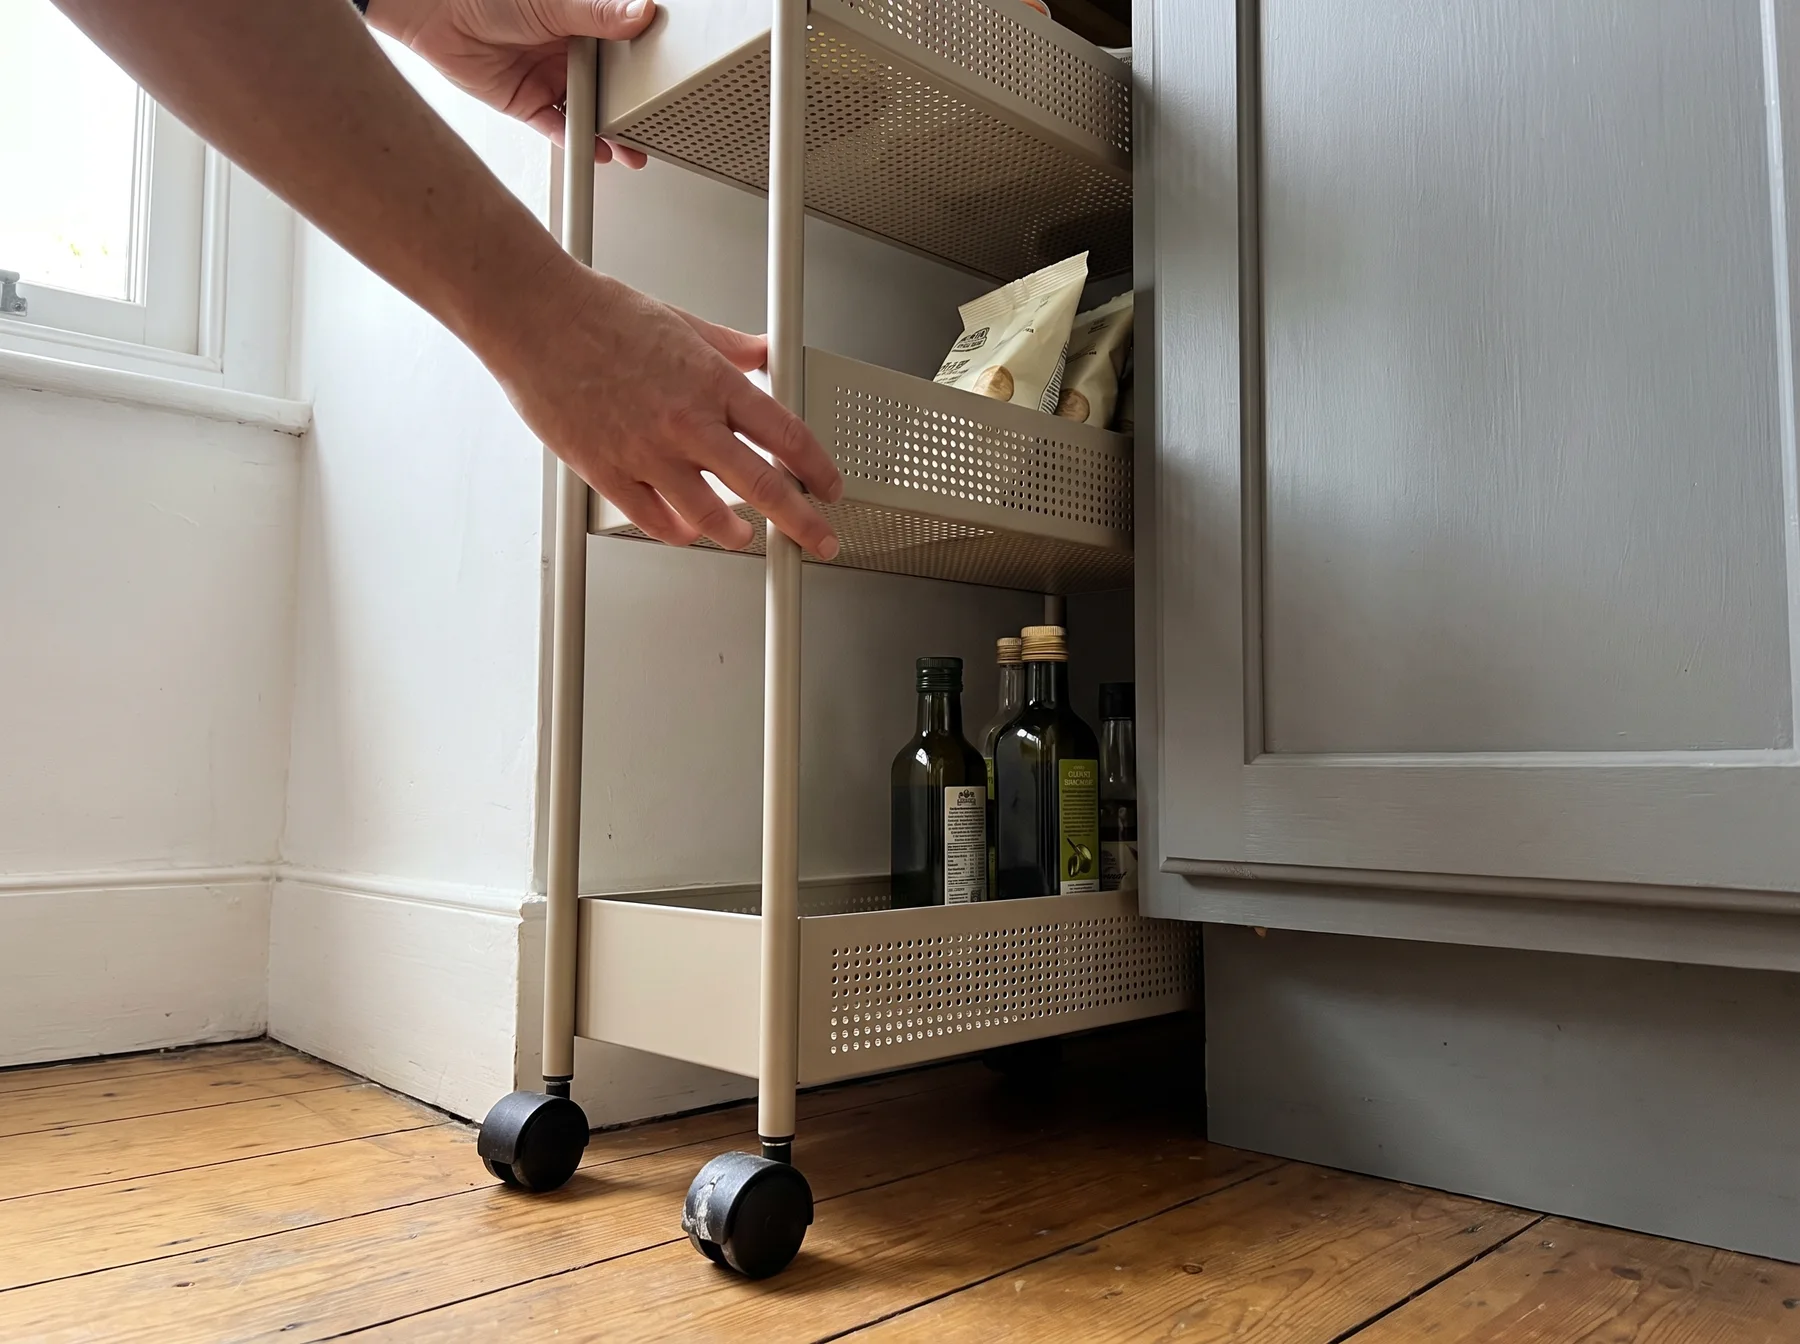
A narrow cart can be useful when cabinets are full but an open gap remains. It should fit without narrowing a walkway, blocking a door, or restricting access to appliances and utilities.
The Pipishell slim four-tier rolling storage cart is approximately 7.1 inches wide and has perforated shelves. It is intended for small supplies in tight gaps. Before considering it, measure the gap at the floor, middle, and top because walls and cabinets are not always square. Keep heavier items low, follow the manufacturer's load guidance, and make sure the cart cannot roll into the cooking path.
A cart is not the only option. A small closed cabinet can conceal visual clutter, while a wall shelf can preserve floor area where approved and safely installed. If neither option leaves a comfortable path through the room, reducing inventory is more useful than adding storage.
Keep the counter functional
A small kitchen counter should first provide a safe place to prepare food. Give permanent counter space only to items that are used often enough to justify it and that can remain clear of water, heat, and grease.
For each countertop appliance, ask:
- How often is it used?
- Is there a safe cabinet location for it?
- Is it comfortable to lift from that location?
- Does storing it create extra setup that discourages use?
A heavy appliance used several times a week may deserve counter space. A lightweight appliance used monthly probably does not. Store cords neatly according to manufacturer guidance, and avoid placing appliances where cords cross a sink, burner, or walkway.
Try to preserve one uninterrupted work area rather than several small empty patches. A single clear section wide enough for a cutting board is more useful than narrow gaps between appliances and containers.
Common small-kitchen organizing mistakes
Buying organizers before measuring
Measure width, depth, height, shelf thickness, hinges, pipes, and door clearance. Also measure the objects the organizer must hold. An organizer that technically fits may still leave too little room to lift out a plate or open a drawer.
Storing by appearance instead of use
Matching containers can look neat while making cooking slower. Keep original labels when they provide preparation directions, allergen information, expiration dates, or lot details. Decant only when the new container suits the food and can be labeled accurately.
Filling every open surface
The top of the refrigerator, a windowsill, or the narrow space beside the stove may appear useful, but heat, moisture, sunlight, ventilation requirements, and difficult access can make these poor storage locations. Empty space can provide necessary clearance and a safer working area.
Treating high shelves as everyday storage
High shelves are best for light, occasional items. Reaching above shoulder height with a heavy pot or glass appliance increases the chance of dropping it. Use a stable step stool on a dry, level floor when needed, and do not climb on counters or chairs.
Creating categories that are too precise
A separate bin for every snack or baking ingredient creates unnecessary maintenance. Use categories broad enough that everyone in the household can put items away without debating where they belong.
A maintenance checklist that takes minutes, not hours
A kitchen system stays manageable when small resets happen during ordinary cleanup. Use this checklist weekly or whenever storage starts to feel crowded:
- Return tools to the zone where they are used.
- Clear the main preparation surface.
- Move older food to the front.
- Wipe spills before returning bins or containers.
- Check that vents, outlets, shutoffs, and service areas remain accessible.
- Remove packaging or duplicates that no longer serve a purpose.
- Move rarely used items out of prime storage.
- Adjust any category that repeatedly collects unrelated objects.
The system does not need to remain fixed. If you consistently carry a tool across the kitchen or leave an item out because its assigned cabinet is inconvenient, change its location. The best small-kitchen organization reflects the way the room is used every day.
Join the conversation
0 comments
Leave a comment
Your email address will not be published. Comments are reviewed before appearing.